Friday, March 31, 2017

Audrey is Here


Yes, we took our Audrey coats for a trip to the playground, for a more whimsical feel to our photos (Isabel's suggestion). Even 25-year-olds enjoy the swings. I took pics of Isabel; she took pics of me. The afternoon was actually a bit too cool for just sweater coats, but we were only a short walk from home, so we braved the cold. Snow tomorrow, and it's not an April Fool's Day joke either.
If you'd like to make the coat, the Ravelry link is here.

Monday, March 27, 2017

Tutorial: Making Polymer Clay Buttons

A little over a year ago I took a button-making class with my good friend Carolyn Barnett. Her buttons are amazing. I will never make buttons with such technical precision and ingenuity. That said, I'm pretty pleased with the custom buttons I've made for two versions of my new Audrey Coat (publication probably by the end of this week). If you read this blog, you've already seen these buttons, made to go with my dark grey coat.


Today I focused on getting buttons done for Isabel's plum coat, shown below drying on the library floor. You're looking at the inside, with the pleat basted closed for blocking (the front is mostly dry, but the pleats and front seed stitch borders make for a lot of layers so now I've opened things up to get more air to the pleat).


Here's what I did to make buttons.
1. I assembled all the necessary equipment, including:
-premo! brand polymer clay in purple and green, plus black and white for colour blending,
-pasta machine, purchased from Michaels (with 40% off coupon) for conditioning the clay and blending colours,
-a cutting blade,
-a roller,
-a ceramic tile (cheap, cheap, cheap from Home Depot) to use as a work surface, and
-a small travel toiletry container which just happens to be 1" in diameter and makes a perfect cutter for the button.
I also laid our some yarn strands in the colours of the coat to help with colour decisions.


2. I started with the plum base. Isabel and I decided to make it a pale plum. If I tried to match the yarn, more than likely the end result would be a bit "off". Better to go for a shade deliberately and obviously lighter. I ran the purple through the pasta machine, together with some black (to tone it down) and white (to lighten it) until we were satisfied with the shade. Actually, this was the most time-consuming part of the exercise. It took forever to get the colour just right. Worth the trouble, though.
3. Next, I did the same for the green, using a bit of black to take it down in intensity.
4. Using the container, I punched out seven rounds of light plum for the base of the buttons. I only needed six buttons, but it's best to have an extra, just in case...


5.Time to make a cane from two rectangles of clay. There's a good video tutorial on making cane here.


6. After reducing the cane a little by carefully rolling it to make the cylinder longer, I thinly sliced little wafers and stuck them onto some plum background. I used the roller (top of pic) to press them into the plum clay. I used a glass jar as a roller on my first batch of buttons for the grey coat. Use whatever you have on hand.


7. I ran the the above piece through the pasta machine ONCE. (In fact, I made a pretty big sheet; what you see below is just a corner of it. You can also see one of the benefits of blending your own colour, as opposed to using a colour straight out of the wrapper. See the colour variation in the green sections? I think this really adds a lot of life to the end result, sort of the equivalent of kettle dyeing yarn.


8. Again, I used the plastic container/cutter to make 1" rounds of the patterned clay. 


9. I carefully centred the patterned cutouts onto the pre-cut solid plum bases, pressing down slightly to remove any possible air bubbles. I used a knitting needle to make holes, then placed the buttons on some parchment paper in a pre-heated 275F oven for 30 minutes.


And here they are, ready for the coat!

Saturday, March 25, 2017

Tutorial: Top-down Pocket Insertion

This is all about knitting pockets into a top-down sweater. Assume you want to end up with a pocket that is 16 stitches wide. Knit to where you want the pocket to be, then drop but don't break off the sweater yarn, and with waste yarn of the same weight as your sweater yarn knit your 16 pocket sts. Break off the waste yarn, return the 16 sts just knitted to the LH needle and re-knit them with your sweater yarn. Then carry on with the rest of the body. You will end up with this:


The waste yarn is acting as a placeholder. When you are ready to complete the pocket, carefully remove the waste yarn and transfer the live stitches to dpns. In the photo below, the top of the sweater is at the top of the picture, while the lower portion of the sweater is at the bottom (the opposite of how you viewed the sweater while you were knitting the body).


Notice that the top needle has one more stitch (16) than the bottom needle (15). With a third dpn, join the pocket lining wool on the RS to the upper dpn and work your desired number of rows in Stocking Stitch (knit 1 row, purl 1 row).  Hint: if you leave a very long end at the start, you can later use it to whipstitch the lining into place. Wind the end into a butterfly to keep it out of your way until then. In the next pic, we're back to looking at the sweater from its top-down perspective.


BO, working the last 2 sts as k2tog for a neat corner.
 

Now return to the needle holding the remaining sts. Pick up an extra st at ea end of the dpn. Do this by sliding each needle tip into the next st in the row (it will be part of the knitted stitches). Make sure that you slide the tip into the part of the knitted stitch that will maintain the same stitch orientation as all the others. The stitch to the right of the needle is the problematic one. The next photo shows the tip about to slide into the next stitch. Can you tell where the tip should go?


Not here....


but here.


For a tidy edging, join the yarn from the WS and immediately BO all stitches knitwise. The ends 
get woven in for a neat finish.


To finish the pocket linings on the inside, use the long end from the pocket lining to whipstitch down the lining to the inside of the garment. By threading a small size dpn vertically through the stiches where you intend to whipstitch the lining, you'll ensure that the lining sits nice and straight. See?


 Here's how the finished and blocked pockets on my grey Audrey Coat look.


Tuesday, March 21, 2017

Audrey....or Lucy?

Yesterday evening I was working on the bottom inch of Isabel's plum version of the Audrey Coat and watching a Lucy Worsley documentary on the Regency. I often knit and watch documentaries--they're not so engrossing that I have to catch every single moment, but they're interesting enough to get me through the boring bits (like the bottom half of the coat). Lo and behold, there Lucy appeared in a plum coloured wool coat complete with wide collar, big buttons, and (yes!) a back pleat. To see the coat in action, with its gracefully swinging pleat, go to minute 42:27 and watch Lucy mount the steps of the train.
According to Lucy's blog post from 2013, "My purple coat is in fact my favourite. I wore it in ‘Elegance and Decadence, The Age of the Regency’ and it came from LK Bennett (though had to be extensively cut down at the tailor’s, because LK Bennett make clothes for goddesses, not gnomes like me.) You can’t see it in this view [a photo taken from the front], but it has a kind of cocoon shape with a very clever pleat down the back."
I guess nothing is ever really new in fashion!

Friday, March 17, 2017

Diving In

On Thursdays I often attend a knit night at the local Portsmouth Tavern, organized by SABLE. The trouble with this is that the pub is dark and noisy, and it's almost impossible to work on anything large or anything that requires concentration. So, the purple Audrey did not accompany me last night. Instead, I dove in to "Diving In". I saw a knitter wearing one of these in a local yarn shop a few weeks ago, and it's been on my mind ever since. The version I saw was in lively turquoise and apple green alpaca, but unfortunately there doesn't seem to be a photo of it on the knitter's project page. Although I rarely knit other designer's patterns, this one appeals because it's in recipe format (like my own Modern Gansey). Plus, it's perfect for those single skeins of hand-dyed sock yarn hanging around one's stash. Here's what I launched last night:


The brick red with black flecks is from Dyeing for Colour Fibre Works, based in not-too-far-off Trenton, ON.
Today is St. Patrick's Day. I always make Irish soda bread to celebrate, and I always use this tried and true classic recipe.


At this moment the aroma in the house is divine. The bread should be cool by lunchtime. We're back to above-freezing daytime temps, and our recent snow is melting.


It being a Friday in conjunction with St. Patrick's Day, no doubt there will be some partying in the nearby student ghetto (sorry, but I simply refuse to use the more politically correct "student village"). Seventeen kegs were confiscated from a house on Earl St. yesterday, so it seems as though the police are ahead of the game. Fingers crossed.

Tuesday, March 14, 2017

Retrograde

It seems that March is the new winter.


We are receiving payback from Mother Nature for our blissfully mild February. Fortunately, we are only on the edge of the blizzard working its way up the east coast, so only 25 cm is predicted here. Mostly, this event is about blowing snow. A day to spend indoors, doing you know what--knitting. And probably taxes. It's that time of the year.
What's on my needles?


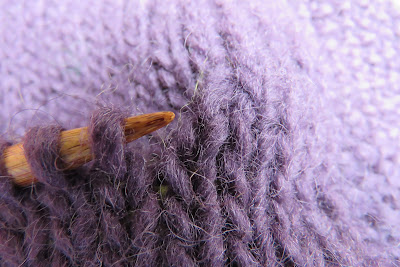
It's an Audrey coat for Isabel in a soft plum colour. This seems to be the year of purple (think of the Fusion cardigan I recently completed for her). I may go with the same green as I used in my own version for the pocket linings. We are talking about buttons too. Striped, perhaps?
Oh yes, I almost forgot to take note of the fact that we have signed on to another house purchase. In June, we'll be moving to the west side of Queen's University, still close to the lake, and to a relatively modern (1907) Arts and Crafts bungalow, fully renovated. Pictures to come...

Friday, March 3, 2017

Audrey Coat: First Photos

These are rather rough photos, not helped by the grey on grey colour scheme. This is a garment that really needs to be photographed on a human being. It's a bit too heavy to dangle comfortably from a coat hanger. Nevertheless, here it is. I've been living in it since it fell off the needles last week.


The pattern is written up and test knitting is in progress. Thanks, testers. Here's my own test. See?


And, because I want an acid green scarf to go with the coat, here's one in progress,


knitted in the brainless but beautiful "Farrow Rib". Every row K2, p1, worked over a multiple of 3 stitches. Not elastic, but perfect for a mohair scarf. Yarn is Katia's "Ingenua".