The waste yarn is acting as a placeholder. When you are ready to complete the pocket, carefully remove the waste yarn and transfer the live stitches to dpns. In the photo below, the top of the sweater is at the top of the picture, while the lower portion of the sweater is at the bottom (the opposite of how you viewed the sweater while you were knitting the body).
Notice that the top needle has one more stitch (16) than the bottom needle (15). With a third dpn, join the pocket lining wool on the RS to the upper dpn and work your desired number of rows in Stocking Stitch (knit 1 row, purl 1 row). Hint: if you leave a very long end at the start, you can later use it to whipstitch the lining into place. Wind the end into a butterfly to keep it out of your way until then. In the next pic, we're back to looking at the sweater from its top-down perspective.
BO, working the last 2 sts as k2tog for a neat corner.
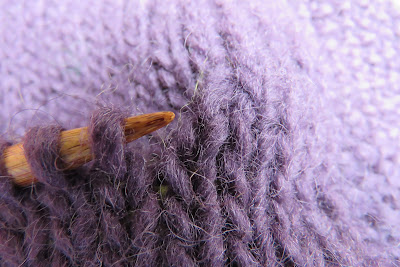
Now return to the needle holding the remaining sts. Pick up an extra st at ea end of the dpn. Do this by sliding each needle tip into the next st in the row (it will be part of the knitted stitches). Make sure that you slide the tip into the part of the knitted stitch that will maintain the same stitch orientation as all the others. The stitch to the right of the needle is the problematic one. The next photo shows the tip about to slide into the next stitch. Can you tell where the tip should go?
Not here....
but here.
For a tidy edging, join the yarn from the WS and immediately BO all stitches knitwise. The ends
get woven in for a neat finish.
To finish the pocket linings on the inside, use the long end from the pocket lining to whipstitch down the lining to the inside of the garment. By threading a small size dpn vertically through the stiches where you intend to whipstitch the lining, you'll ensure that the lining sits nice and straight. See?
Here's how the finished and blocked pockets on my grey Audrey Coat look.


