Monday, December 19, 2022

About Red

This is not the first post on this blog about red. It must be this early winter time of year, with months of cold, dark, and snow lying ahead that makes me think of the cheeriness of red. Mostly, I love when it appears in small doses, as an accent to everything around it. But this post is about all the shades and moods of red.  Like the brick red house across the street,

the red in the Virginia creeper on our garage roof, and the lower portion of our neighbours' deck,

the red in our hall carpet surrounded by a sea of neutrals,

the neon red choke cherries on a nearby front lawn, and

the attention-getting red of this burning bush in the median of the street behind our house,

And look at my watercolour chart to see all the hues, shades, and tints that can be mixed from red.

Finally, here's what just fell off my needles. Yes, another Pembroke Scarf. 


 Christmas is coming after all, and doesn't everyone want/need a red scarf?

Friday, December 2, 2022

Your Secret Superpower

What is a maker's secret superpower? It's the ability to ALTER patterns, of course. I call it "secret" because it's so underrated. Frequently, knitters write to me on Ravelry to complain that a finished design doesn't fit --it's too deep in the armholes, or the back neck is too wide, or ... Understandably, they are frustrated after putting in so many hours of work. How to avoid disappointment? 

1. Always begin by checking out the FINISHED measurements. Hopefully, there's a schematic because it will usually have more information than the short list of measurements at the start of the instructions. Look over the finished measurements VERY CAREFULLY. Also check out the amount of "ease" that is recommended. An oversized design like Audrey will have a lot more ease than the Perth Cardi

2. Be especially careful with length measurements. When a designer publishes a pattern with a magazine, they are required to design to an industry standard which is usually for someone who is around 5'6". For all you sewists, go here for a list of heights used by popular sewing pattern companies; notice the wide range, from 5'1-5'10". If you're in doubt about how long to make your garment body and sleeves, including armscye depth, use a piece of clothing from your closet as a template. Be aware that many knitting pattern stitches grow in length after blocking. A good example is the Modern Gansey. I always suggest wet blocking work in progress. You'll save time and be much happier in the end.

3. Don't be afraid to make changes. Start small, preferably with simple top-down knitting patterns. If you're changing sleeve length, you'll need to re-calculate the rate of increase or decrease. I usually just start decreasing a couple of inches from the underarm and stop when the sleeve is the right width for me. Over time you'll gain confidence and find yourself ready to tackle more dramatic changes. Need extra length in the back to prevent your cardigan from riding up? Add some short rows. Short rows can also solve bust fitting issues. Many a knitting designer got their start when they realized that they had, over time, acquired the tools to invent and execute their own creations.

4. If you're a sewist, use old bed sheets as "muslins" to check for fit and make alterations. Sometimes it takes me several tries to get a new pattern to fit just right. Just half an inch change in length or width can make all the difference.

Recently, I tackled a forward shoulder adjustment on Dress #2 from 100 Acts of Sewing, and removed darts from the bodice of Tessuti's Felicia dress. I used this excellent tutorial for guidance with the latter. After removing 1 1/4" from the lower bodice and 1/2" from the armscye, the pattern piece was quite a cut and paste job!

That French curve grading ruler has become my best friend. Prior to acquiring it I had to rely on the curved edges of plates and once my roasting pan!

The dartless result of this effort was so worthwhile.

 
Other mods included another 1 1/4" off the skirt, and the addition of large semi-patch pockets (the sides are sewn into the side seams). I wanted the look of Merchant & Mills' "Hattie" without the over-engineering of multiple bodice darts and a bodice lining.
Worn here with the Perth Cardi. Note that these are "fake" buttons, merely sewn on with black snaps underneath. No buttonholes involved. 
 

Friday, November 11, 2022

A More Discreet Raglan Increase

This is a photo of the alternative to the Yarn Over increase that I used in Mr Greenjeans. I don't think there's an agreed upon name (or abbreviation) for it, but Emily Wessel of Tin Can Knits refers to it as a "knit under the bar" increase.


When you come to the point where you would otherwise make a Yarn Over, you simply make a knit stitch under the thread connecting the stitches before and after. Instead of a great honking buttonhole you get this nice, tidy decorative opening. Bonus: like the YO increase, it's fast and easy, especially compared to the more common Make 1 increase.

Wednesday, November 9, 2022

A Winter Uniform

I have a new favourite dress. It's my latest modification of the Carson Dress, this time with 3/4 length sleeves.


The fabric is Robert Kaufman's Brussels Washer, a linen/rayon blend that's perfect for all seasons, but especially winter. It drapes beautifully and resists wrinkles. It can be a little difficult to source in Canada, although if you hunt around the internet you can find sources.

Mods: 1. Neck raised 1 1/2 inches. I might even raise it by another 1/2 inch in the next iteration. The original has a whopping huge opening.

2. The bodice and skirt widths have been reduced by 1/2 inch at each side on the pattern pieces for a total width reduction of 2 inches. As originally drafted, I would have been swimming even in the size Small.

3. I took one inch off the bottom hem, then did a doubled 1/4 inch hem. 

4. I "perfected" the cut of the pocket pieces. The pocket and pocket lining pieces were not perfectly aligned with each other or with the dress front, but that was easily solved. I find this sort of thing is a bit more common with indie patterns.

What I love about this dress:

1. The slanted pocket openings.

2. The 3/4 length sleeves. Perfect for winter when worn under a sweater.

3. The extraordinarily comfortable high waist.

4. There are no darts. With a T-shirt underneath, no bra is necessary. A win, for sure.

5. The whole thing, from cutting to wearing took only three half days of effort.

As Bill was quick to point out, this dress wouldn't make it on the streets of Paris. My response, "It would, however, be perfect in a Merchant & Mills photo shoot." It's rather like a cross between M&M's "Ellis" and "Florence" dresses.

FYI, the cardigan is my now very old Wakefield Redux in Galway wool, no longer available in Canada. Is it still being sold by Plymouth in the US? Such a lively green. The elbows are about to go, so I need to take care of that asap. The outfit is pulled together with my Pembroke Scarf in Regia sock yarn.  Worn with leggings and ankle boots, it's perfect.


I love this outfit so much that the first thing I did when we got home was to order more Brussels Washer to make a second dress. This is definitely my new uniform.

Wednesday, November 2, 2022

Welcome Back, Mr Greenjeans

In 2007, Knitty Magazine published Amy Swenson's lovely little cardigan "Mr Greenjeans", and I promptly made a version for myself. It was the year we moved back to Canada after 16 years in Washington, DC. It was the year Bill became a semi-retired person, although he continued doing contracts for the World Bank as well as working some adjunct professorships for a few more years. It was the year James went away to University.

At the time, the knitting universe was in a state of evolution. There were a number of digital pattern platforms popping up. There was Patternworks, started here in Canada. And the next year along came Twist Collective, also based here, under the leadership of Kate Gilbert. I got my start publishing patterns with these two, as well as Knitty. 

In 2007, Ravelry was founded. It was different. It allowed designers to publish their own patterns directly, without going through submissions, editing, and the half-year long wait to finally see a pattern go live. It enabled designers to do their own photography, add links to tutorials without the constraints of hard copy magazines, do post-publishing corrections and changes, and best of all see photos of finished projects and comments from knitters. 

Knowledge of Ravelry spread slowly at first through the knitting world. In 2010 at the NY Sheep and Wool Festival in Rhinebeck, I went to a Ravelry get-together wearing my little Ravelry button. There we all were in a small grassy field. Only a few years later, pretty much every one of the thousands of attendees at Rhinebeck was a Ravelry member.

The success of Ravelry naturally led to the eventual extinction of most of those earlier online platforms as the digital knitting revolution sorted itself out. But Knitty has stuck around. Last summer I browsed through some of the early issues and was reminded of how much I enjoyed knitting and wearing that old Mr Greenjeans. I decided to make a replacement using some skeins of BT's Shelter in "Snowbound" from my stash. And here it is:

Modifications: 1. Instead of yarn over raglan increases, I chose to do the more discreet "knit into the space under the thread connected to the next stitch". There's a little hole, not a great gaping buttonhole.

2. I made the sleeves wrist length. If it's cold enough to wear a sweater, you generally want your forearms covered.

3. I made four buttonholes, not just one. You can always do up just the top one. I like the way the cardigan hangs on me when it is fully closed.

4. I made this buttonhole from my tutorial on buttonholes in 2x2 rib.

Welcome back, Mr Greenjeans, and thank you, Amy Swenson. Now, I'd better post a photo of my new cardigan on Ravelry.

Sunday, October 23, 2022

Heliotrope

Sometimes connections forged in childhood remain for life. So, whenever I think of this purple/pink (pink/purple?) colour, I also think of Miss Heliotrope, the governess in Elizabeth Goudge's "The Little White Horse". It's completely stuck in my brain and there's no possibility of severing the connection. I loved the book back then, and I love this colour in my adult life. See?

I've been hauling out the winter woollies and organizing them for the season ahead. I think this little combo is going front and centre in this year's favourites. From left to right:

Churchmouse Yarns & Teas' Studio Beret, my handspun handknit Bellevue Mittens, and my Diamanda Mitts in the "pink lemonade" colourway. 

They're all going to have a little sudsy bath tomorrow before going into this season's rotation. That is, once the gloriously warm fall weather evaporates.

View from Lemoine Point.

Monday, September 19, 2022

The Return

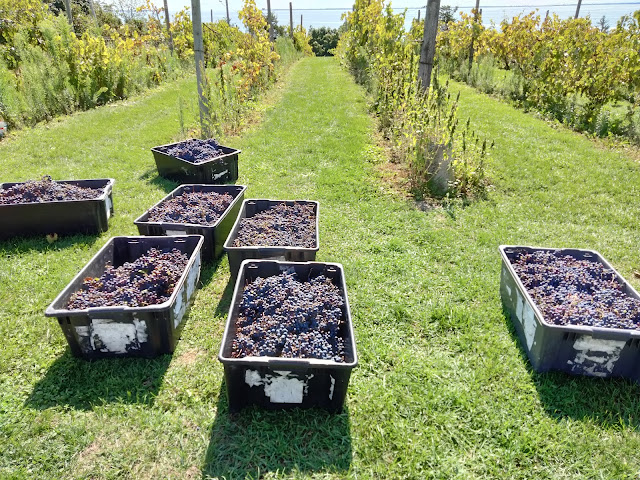
September has arrived and, as planned, we returned for lunch at County Cider in Prince Edward County. It happened to be the day when the grapes were being picked. (Yes, they grow grapes as well as apples.)


Perfect weather and a perfect day, making for a perfectly boring blog post. No knitting was accomplished since our timing with the ferry was also perfect with only a couple of minutes of waiting.
As usual, we made sure to visit Hagerman's farm stand to stock up on our way back.
 
 
Truly the best time of the year!
 
Back home, feeling a little burnt out from spending most of August painting the house (still not finished), I decided to haul out some nice Waverly drapery fabric from our linen closet and transform it into new cushion covers. This was fabric that was purchased 23 years ago while we were living in Washington, DC and that has been curtains in various houses we have owned. I hated to see it just sitting on a shelf going to waste.


My current phone has a really bad camera; I apologize for the poor quality of my pics.

Friday, August 19, 2022

Summer Summary

I haven't blogged in ages. Apart from the fact that blogging has fallen out of fashion in a world of Instagram and Tiktok, I think the pandemic has had the effect of making a lot of us simply want to cocoon in our own private world. I seem to have lost the drive to make new knitting patterns while I focus on painting our house's interior, advancing my sewing skills, making yogurt, and sending James off to live and work in the EU.

Where to start? Who would have guessed that it would be so much fun to paint the interior of our house? It's become my pandemic project, one that I can tackle at my own slow pace. Our WW1- era bungalow is small enough to demand a cohesive colour scheme, and here is what I've chosen.

  https://media.benjaminmoore.com/WebServices/prod/dollops/90x90/HC-171.png        https://media.benjaminmoore.com/WebServices/prod/dollops/90x90/HC-165.png         https://media.benjaminmoore.com/WebServices/prod/dollops/90x90/1590.png         https://media.benjaminmoore.com/WebServices/prod/dollops/90x90/2124-70.png         https://media.benjaminmoore.com/WebServices/prod/dollops/90x90/912.png  

From left to right: Wickham Gray, Boothbay Gray, Paperwhite, Distant Gray, and Linen White, all from Benjamin Moore.

Names are deceiving. "Distant Gray" is actually a clean, fresh white. "Linen White" is a cream with a very pale, slightly yellow undertone. The palette is light, neutral, calm, but not boring. My intention is to bring as much light into the house as possible without going for the ubiquitous all-white look. The vestibule is looking better in blue greys after I opened it up by removing the ugly and dysfunctional folding closet doors. It took a week to get rid of all the wallpaper.


And here's the living room with its newly refreshed walls.

 At my feet is my current sweater project, Mr Greenjeans, proceeding at a glacial pace. 

I decided to reduce the size of the raglan eyelets by knitting into the horizontal thread between two stitches instead of making full-blown yarn overs. Also, I'm making the sleeves full length. If it's cool enough for a wool sweater, you generally want your forearms to be warm. Yarn: BT Shelter from stash.

My latest sewing project has been Style Arc's Adeline. An easy pattern, but not one to be undertaken by novices given the scanty instructions. For anyone looking for an excellent YouTube tutorial on sewing V-necks, I recommend this one. As usual, instead of an interfaced neck facing, I opted to make the facing out of batik cotton, a fabric that is dense and non-stretchy. See?

The mauve colour isn't my favourite; put it down to the perils of online fabric ordering.

Finally, James has made a move to Ireland to live and work. We had a lovely day together in Prince Edward County before he and his freshly washed sweater collection left. Here he is enjoying pizza and cider in Waupoos overlooking Lake Ontario.

 I mean to go back in September with Bill when the crowds are gone and the air (and apples) are crisp.

Saturday, June 11, 2022

Winslow: Quick and Easy

 Here are my new Winslow Culottes. I made them in a floaty Japanese cotton from Closet Core.

Helen's Closet offers instructions for numerous hacks of this pattern, two of which I employed -- the elastic back and the slash pockets. Sewing Therapy also has a useful video showing how to make the culottes step-by-step. I love the flat front (with the elastic back hidden under my jacket) and the deep pleats. The culottes also look great layered under my York Pinafores. A win, for sure.

P.S. My sewing room in the background is another room in dire need of a paint makeover. However, it'll have to wait. This week's big excitement is the installation of central air conditioning. Naturally, in the perverse way of things, we are having the coolest summer I can remember, but at least we'll be prepared.

Friday, May 27, 2022

Tutorial: How to Sew Darts

This is another of my sewing tutorials for Isabel. 

1. Gather your materials. You will need:

your pattern, with darts marked, your cut fabric, tailor's chalk or a water soluble pencil to do the marking, pins, and a ruler. I prefer chalk since it is so easy to use and remove. See the purple gizmo? That's my Dritz chalk sharpener. Such a useful little piece of plastic! 

2. Working on each side of the bodice separately and with the WRONG side facing, lay the pattern piece over the fabric piece, carefully lining everything up.

Anchor the pattern piece down in the areas above and below the dart. Here I am using a knitting magazine and some coasters. You don't need fancy pattern weights. I like having my self-healing mat underneath because it keeps the fabric from sliding around.

3. Gently lift the outer edges of the pattern over the dart and mark where the top and bottom of the dart meet the fabric edge.

Make just small marks for now. IMPORTANT: Some darts have the centre fold line marked. You can ignore that; it's superfluous, and the fewer marks on your fabric the better.

4. Using a pin, poke a hole through both pattern piece and fabric at the apex of the dart.


Wiggle the pin around enough to make a visible (but not damaging!) hole in the fabric. 

5. Lift up the pattern piece and the pin and find the tiny hole. Mark a cross over it. The vertical line of the cross will be helpful later on during the sewing, so extend it a bit.

5. Take your ruler and use it to mark straight lines joining the centre of the cross to the markings at the edge of the fabric.

Make the markings heavy enough that they won't rub away while you pin the dart together in the next step. 

6. Now pin the outer lines of the dart together like this. You will need the fold to be to your right when you sew, so make sure the pins will be on the side of the fabric facing you when the fold is to your right. If you find your markings are fading, touch them up before you hit the machine.

7. Time to sew. Begin by backstitching at the outer edge of the fabric and use a regular stitch length until your get to about 1/2" before the apex.

8. At that point, switch your stitch length down almost as short as it will go.


9. Complete the dart, hand turning the needle for the last 1/4" as you taper into the apex, finishing up with just one or two threads at the very point. Cut the thread LEAVING 6" TAILS.


10. Now to the ironing board. Grab a sleeve ham if you have one. (If not, a balled washcloth can work in a pinch.) Remove all markings before you proceed. Chalk rubs away easily with a dry washcloth. If you used water soluble pencil, then rub it off with a damp washcloth. Begin by setting the stitches. Simply lay the iron on the folded seam, staying away from the point of the dart. KEEP THE IRON AWAY FROM THE APEX UNTIL LATER, AS INSTRUCTED.

11. Open up the dart and finger press it with the fold pointing DOWN toward the waist. Finger pressing will really help your finished dart to melt invisibly into the fabric. Continue to stay away from the apex.

12. Apply steam to the right side of the dart, still staying away from the apex.

13. Now lay the dart over the curved end of the sleeve ham and finger press the apex open until it is quite flat. Finally, apply steam to it. It should look like this, with no puckers.

14. Turn the dart to the wrong side and tie the thread ends in a square knot (right over left, left over right, or vice versa). Clip the thread ends to about 1/2" in length. 


Done!

Thursday, April 21, 2022

Jumble

 I'm using up my leftovers to make this.


Truth be told, I like some of the Ravelry projects much more than the original. Like this one, and this.
The yarns are a jumble, from Cascade Eco+ to Berroco's Mercado. So far this is fun and quick, and hopefully useful.

Saturday, March 19, 2022

On the Verge

Is an early spring a warning sign of a hotter than normal summer? I hope not. Anyway, here we are still in March and the robins and red wing blackbirds are back and the ice on the lake is on the verge of breakup. This was the view out toward Wolfe Island this afternoon. Without the sound of the open surf, the lake is eerily silent, holding its breath for what's coming.

Continuing on with the black, white, and grey scheme, here are three of my March makes. From left to right: 

  • Pants #1 from 100 Acts of Sewing, my favourite trouser pattern (note that even though I am 5'1", I always add an extra inch to these and they're still slightly above my ankles) in linen/cotton,
  • York Pinafore from Helen's Closet in yarn dyed linen check from Blackbird Fabrics (I've lost count of how many of these I've made),
  • Felicia dress from Tessuti Fabrics, an Australian company, in grey/blue linen from Pure Linen Envy.

Since a girl can't exist only in grey scale, I'm making a new Glenora in this bright turquoise Cascade Eco+. I think the colour, "Pacific", has been discontinued.

When it first arrived via mail order I thought it was overwhelmingly bright, but on this rainy day it looks just right!